How to Candle a Chicken Egg With a FLASHLIGHT (Easy)
Posted on by
If you’re looking to breed chickens or incubate any type of egg in order to hatch chicks, then candling is something you should strive to become familiar with.Candling is a process in which a light is shone through the shell of an egg to check for fertilization, defects, and freshness. This process can be useful for anyone who works with chicken eggs, however, it’s most commonly used to check for fertilization when used by small-scale farmers.
We’ll cover how to candle a chicken egg step-by-step in this guide!
*This post may have affiliate links, which means I may receive commissions if you choose to purchase through links I provide (at no extra cost to you). As an Amazon Associate I earn from qualifying purchases. Please read my disclaimer for additional details.
Candle Chicken Eggs
Candling chicken eggs are essential for any person who’s looking to hatch baby chicks. Knowing whether or not your chick is developing properly can keep you from incubating a chick that might not make it.Despite the name, candling a chicken egg does not actually require you to use a candle.This name came from older processes where the light of a candle was actually needed. Realistically, you can use any type of light to candle an egg.
Why Candle a Chicken Egg?
The most common reason to candle a chick egg is to check to see if the egg is fertilized and if the embryo is developing properly.
Why Candle Unfertilized Eggs?
Larger scale operations may also candle a chicken egg to ensure the egg meets its quality standards, even when the hen is not exposed to a rooster. Read more about the outcome of eggs laid without a rooster in this article: How Do Chickens Lay Eggs Without a Rooster?
Egg Candling Tools
Modern processes use an artificial light source such as a flashlight, light bulb, or lamp.
DIY Egg Candling Tools
There’s also an option to make one of your own. Here’s a youtube video that walks you through the process of making a DIY egg candler:
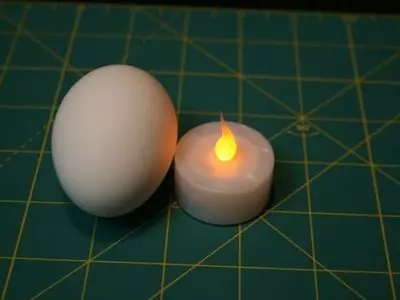
Using a Flashlight for Egg Candling
A commonly used option is simply using the flashlight or flashlight from a phone to shine through the eggs. If you are working on a smaller scale, and only need to check for fertilization, this is an affordable option.
Egg Candling Process
To begin candling, you are going to want to be in a very dark room. The darkness will help you to visualize what is going on inside the egg.You will put the wider end of your egg on whatever tool you have chosen, and carefully adjust the egg until you have the best seal with the light.
Getting Started
Once you have the best possible seal, turn on the light and take a look at the egg.Fertilized eggs should have a network of blood vessels that run under the shell of the egg. These can appear light in color or red when candling.
Internal Egg Structure
The surest sign of successful fertilization is a dark embryo, that can be visualized in the middle of the egg.The contents of the egg will look different depending on when the egg was fertilized. Read our related article,How is a Chicken Egg Fertilized? to learn about the mating and reproductive processes of chickens!
What if my Egg isn’t Fertile?
When candling, especially early on, don’t become discouraged if you do not see any embryonic development. Some of the early signs can be very subtle.If you do not see any development, give the eggs a few more days to develop, and then check again.
What if My Egg’s Development is Behind?
If you have an egg that seems to be behind in development, it is always the best practice to be patient and give the egg a chance. There are a number of factors that the egg could appear behind, but it could still hatch with its siblings. Read our related article on Everything You Need to Know About Chicken Eggs. This article takes a deep dive into all things chicken egg!
Chicken Egg Candling Day 1-21
It’s important to remember to begin candling only once the 10th day has hit. Doing so beforehand won’t necessarily show you much or give you the answers you’re looking for.As the embryo inside the egg develops, the appearance of the internal structures will be different. If you candle the egg daily, you will see notable differences between days. In the early days, the egg may seem empty. In the later days, the egg will be so full you will not be able to differentiate structures.
Egg Candling Chart
The best way to see what to expect is to use a chart. The chart from incubatorwarehouse.com is a good start. Egg Candling and Breakout Analysis, from the University of California, also provides helpful comparisons to infertile eggs and eggs that have died in incubation to help you know what you’re looking at when candling an egg.
How to Candle a Chicken Eggs in an Incubator With a Flashlight
Can you Take your Eggs Out of the Incubator?
When you are using an incubator for your eggs, you may be wary of taking the eggs out of the incubator. Remember, if the chicks were being hatched out by a mother hen, she would likely get off of the eggs for short periods of time. This means that it is totally okay to remove your eggs from the incubator a few times during their incubation to candle them.
Handling the Egg
Before removing the eggs from the incubator, wash and dry your hands thoroughly.The oil from your hands could clog the egg’s pores, which are necessary for oxygen exchange between the chick and the environment.From there, simply handle the egg carefully, candle it, and return it to the incubator.Read More:How Does a Chicken Lay an Egg Everyday? Discover the ins and outs of egg-making here!
Incubators With Candling Functions
If you decide that you do not want to take your eggs out to candle them, some incubators have a candling function included.With this function, you can turn the lights off and turn on the candling function to check your chicks’ progress without removing them from the incubator.
Where to Buy Candling Equipment
Here’s an egg incubator that has both functions. As you can see, this option is a bit pricey. Many egg incubators include a single candling tool on the top, which allows you to remove and candle your eggs one at a time.
Both of these options are great, but remember that you can always use any sort of light to shine through your eggs in order to candle them.
Read our related article on How to Hatch a Chicken Egg Without an Incubator! We explore various DIY options to help you hatch chicks.
What to Do When the Eggs Hatch
When your eggs begin to hatch it’s important to let them do it themselves. They should not need any help from you. So be sure to leave them there until they’ve all hatched.When your chicks begin to hatch, keep calm. The chicks should be allowed to hatch on their own, without any interference or help. It can take up to 24 hours for a chick to leave a pipped shell, so give them as much time as they need.
After the Chicks Have Hatched
The chicks will need to stay in the incubator until all the eggs have had a chance to hatch. After this, move all of the chicks to the brooder. Hatching is a difficult task, so they will be exhausted.
Feeding Newly Hatched Chicks
Make sure to offer them water and food.
There are a few options when it comes to food such as:
Commercial feed
Snacks
Homemade feed
Natural Feed
Commercial feed generally consists of a lot of grains and chemical nutrients while natural feed can be organic or non-GMO and better in general for your chicks (and for you if you plan to eat the meat or eggs).
Snacks can include veggies and fruits for the chicks to peck at, like corn or lettuce.
You can also make a homemade feed with boiled eggs (yep!) and oatmeal.
Check out this article on What to Feed Baby Chickens After Hatching for more information.
Conclusion
Candling a chicken egg is incredibly helpful to know the quality of the egg, whether the egg has been fertilized, and if there are any developmental issues in the embryo. Candling an egg can be tricky, so be patient and do your best. These tips should help you when you begin the process.